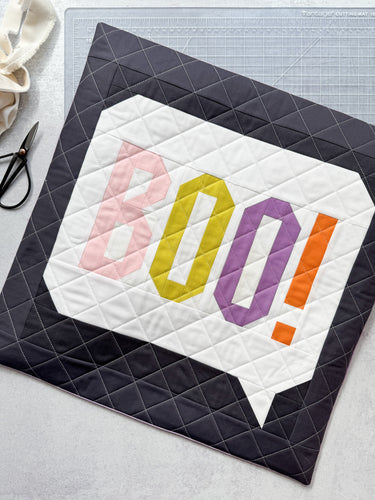
What quilter hasn't found themselves with a lonely block or two…we all start our projects with the best intentions, but sometimes life gets in the way. My favorite way to use lonely blocks is to turn them into a quilted pillow cover!
Making a quilted envelope pillow cover is a quick and rewarding project. Not to mention a practical way to add a handmade touch to your home! So, let’s dive into the step-by-step process of creating your own quilted envelope pillow cover. First, let's talk about what you'll need!
Note: This project uses my "Boo Ya!" block from the 2024 Spooky Season Sampler. Please visit the FAQ page for more information on the Spooky Season Sampler.
Materials Needed
- Fabric: ⅛" to ¼" yard, depending on your block
- Batting: roughly 20" x 20"
- Lining fabric: 20" x 20"
- Backing: Half a yard. Cut two pieces of fabric from it, one 19.5" x 14.5" and one 19.5" x 11.5".
- Pillow insert: either 19" or 20"
- Sewing supplies: sewing machine, pins, point turner, thread, basting pins or spray
Now, let's go through all the steps to turn your lonely spooky block into an envelope pillow cover!
Step 1: Size the block
Let's start by ensuring your block is the right size for your pillow. This might require minimal math because, depending on the sizes of your block and pillow, you might need to add a border to the block so it's the right size.

I'm using my Boo Ya! Block from the 2024 Spooky Season Sampler, which is 15.5" x 15.5". We have 19" x 19" pillow inserts in our house, so that's the size I'm shooting for. So, in my case, the border strips are 2.5" x 15.5" and 2.5" x 19.5". All I did to find these sizes was pillow size - block size.
First, let's sew the shorter strips to the sides and then the longer strips to the top and bottom.

Step 2: Quilt the Front Panel
I like my pillow covers to be quilted – it just adds such a nice texture to them, so let's quilt the front panel. Here’s how:
- Layer: Lay your lining fabric wrong side up, then place the batting on top of it, followed by the quilt block right side up.

2. Baste: You can use clips or spray. I prefer spray basting, so that's what I did.

3. Quilt: Quilt the front panel. You can do some nice straight lines, diagonals, a grid pattern, or use a decorative stitch like the wavy stitching. I did some diagonal crosshatch about 1.5" apart

4. Trim: Once you’ve finished quilting, trim any excess batting and fabric so that the front panel is the correct size for your pillow. I trimmed mine down to 19.5"

Step 3: Prepare the Back Panels
Next, let's prepare the back envelope panels by finishing the edges.
On each back piece, fold the long edge under twice, about ¼" to ½". You can measure this so it's precise, or be like me and eye it.

Give the fold a good press with your iron, then topstitch it down, sewing ⅛" away from the folded edge. This will prevent the fabric from fraying and give the back a clean look.
Step 4: Assemble the Pillow Cover
Now, it’s time to assemble your quilted pillow cover.
First, layer your pieces by placing your quilted front panel right side up. Then, lay the larger back piece on top of it, with the right sides together, with the raw edges touching. Lay the smaller back piece on top of that and the right sides together, with its raw edges touching the raw edges of the quilted front.

The two back pieces should overlap a few inches, creating the envelope closure.
Next, pin or clip the layers. You can go all the way around or on a few strategic places – the back panels overlap, the corners, and the centers of each side.
Then, using a ¼" seam allowance, sew all the way around the pillow cover’s outer edge. I like to backstitch over where the back panels' edges are and at the beginning/end of my stitching for added strength.
Step 5: Turn and Enjoy
Once you’ve sewn around all the edges, clip the corners to reduce bulk, making sure not to come too close to the stitching. Then, turn your pillow cover right side out by pulling it through the envelope opening. Use a point turner or another pointy, but not sharp, object to push the corners out.

Finally, insert your pillow form into the cover through the envelope closure and admire your hard work – or even better, snuggle it!

Isn't this just such a fun way to make use of lonely blocks? Now that you know how to make a pillow cover, you can turn any quilt block into one – maybe one for every season!


Thank you for the great instructions! I just finished making 2 Scrappy Applique envelope pillow covers for Christmas. They came out perfect thanks to your instructions!