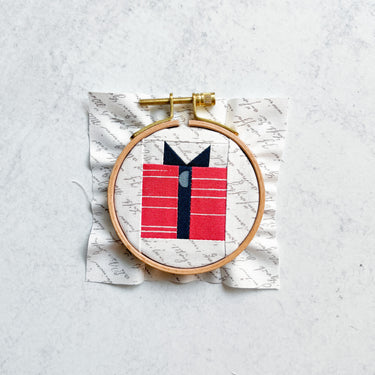
Hi, hi! I'm so excited to share these cute little hoop ornaments. They make the perfect gifts or quick and easy holiday project.
I designed this 3" hoop ornament pattern as part of the celebration of Hush Hush 2, a collaborative collection of low volume prints from Riley Blake Designs. Twenty-one designers, including myself, created a low volume print each! For this collection, I designed a cute print confetti print. it's so fun and sweet and makes the perfect background print!
But back to the hoop ornament! Here's how to make your own -
Materials
Quick tip: I highly recommend starching your fabric before cutting it for this project. It'll make handling the teeny tiny pieces much easier while sewing.
- Background Fabric: Assorted pieces of a low volume fabric - cut:
- [x2] 1" x 7/8"
- [x1] 1" x 1 1/2"
- [x2] 2 1/4" x 1 1/2"
- [x2] 1 5/8" x 4 1/2"
- Gift Fabric: Scrap roughly 3" x 3"- cut:
- [x2] 1 1/4" x 2"
- Ribbon Fabric: Scrap roughly 2" x 2" - cut:
- [x1] 3/4" x 2"
- [x2] 1" x 1"
- [x1] 3″ embroidery hoop
- Fabric Glue
- Felt and ribbon, optional
Instructions
- Draw a diagonal line on the wrong side of the 1" x 1" ribbon fabric squares. Place one on the bottom left corner of one of the 1 1/2" x 2" background. Sew on the marked line, trim 1/4″ away from the seam, and press. Repeat with the second 1" x 1" square on the right side of the background piece.
- Sew the two 1 1/4" x 2" gift fabric rectangles to either side of the 3/4" x 2" ribbon rectangle. Press seams open.
- Sew units from step one and step two together to make the gift.
- Sew the two 2 1/4" x 1 1/2" background pieces to the top and bottom of the gift.
- Sew the two 1 5/8" x 4 1/2" pieces to the left and right of the unit from step 4.
- Center and insert the block into the embroidery hoop. Tighten.
- Trim the excess fabric from the back of the embroidery hoop.
- With the fabric glue, glue down and secure loose fabric on the back of the embroidery hoop.
- If you desire, trace the embroidery hoop on a piece of felt, and apply the felt circles on the back of the embroidery hoops, using the fabric glue to secure.
- Tie ribbon to the top of the embroidery hoops.


Don't these just look adorable on the Christmas tree! There were so, so easy to make! I think it took me about 30 minutes to make each one and it's the perfect project for 5" stackers and scraps!


Okay I don’t see the 1 1/2 × 2 inch cut of background for the bow construction. Is it missing?
So cute! Thank you for sharing.